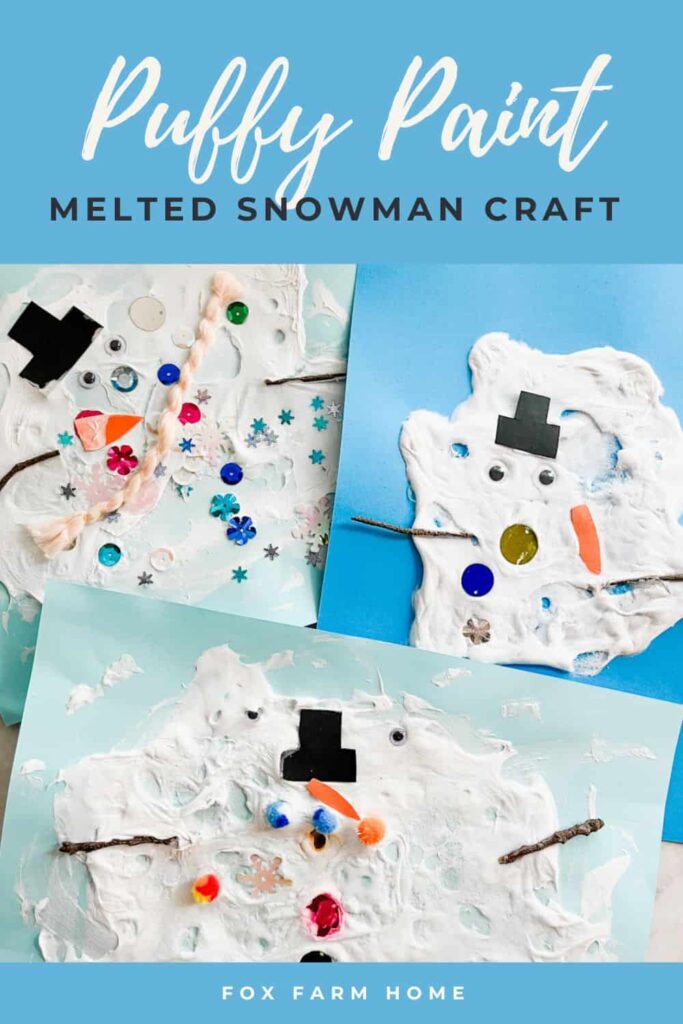
Kids will love building their own melted snowman with this fun and simple snowman craft for preschoolers. These painted melting snowmen are a wonderful way to explore textures and early fine-motor skills. Plus, no two melted snowmen ever look the same—each one has its own cute and silly personality!

Mixing shaving cream and glue creates puffy “snow” that dries with a soft, raised texture that is so fun to work with and touch. Preschoolers love spreading the fluffy paint and adding the details that bring their snowman to life.
My kids loved that their snowman looked different every time and they made quite a few melted snowmen!
This is a fun winter craft for kids of all ages and a great indoor activity for the winter season when you are feeling stuck inside and needing something fun to do!

This post contains affiliate links, which means I will make a small commission at no extra cost to you. Please see my full disclosure here.
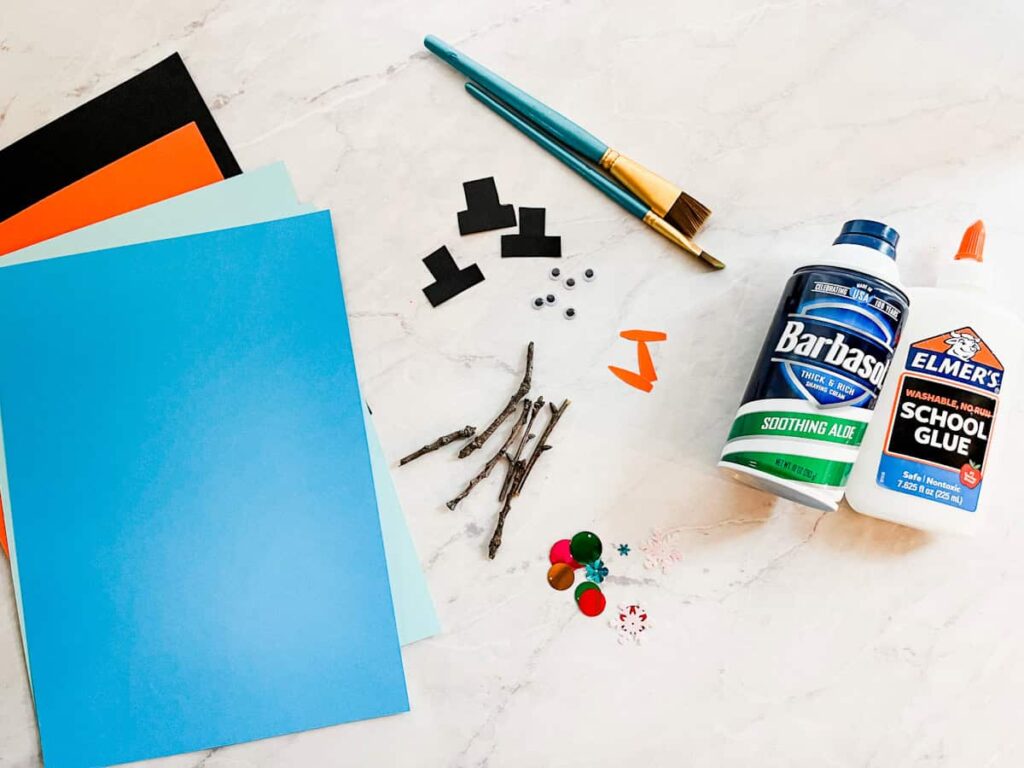
Materials Needed
- Shaving cream (Foam not gel, we used Barbasol shaving cream)
- White school glue
- Bowl & spoon
- Paint brush
- Construction paper or cardstock (We used black for the buttons and hat; orange paper for the carrot nose; and blue for the background)
- Googly eyes (optional, but highly recommended :))
- Twigs or cut out brown paper for arms
- Scissors
- Optional: glitter, snowflake sequins, ribbon for a scarf
How to Make an Easy Melted Snowman Craft
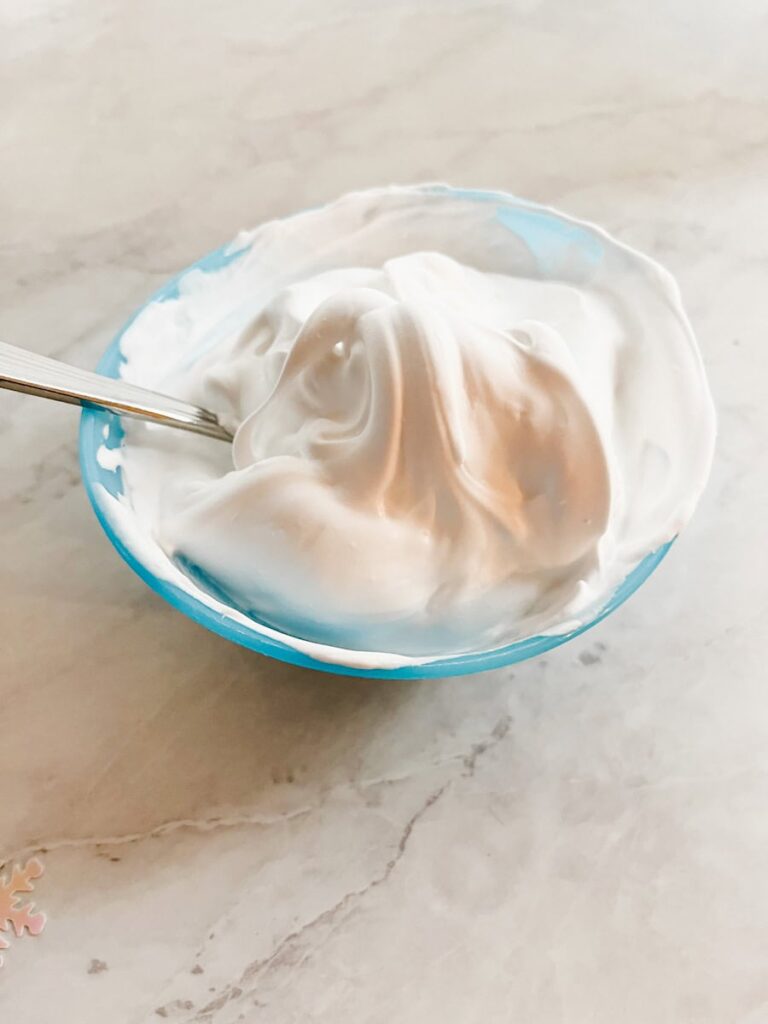
1. Mix your puffy paint
Combine 1/2 cup shaving cream and 1/4 cup white glue in a bowl. The mixture will feel airy and look like marshmallow fluff. (My daughter asked if she could eat it so it does look fluffy and like it could taste good, I had to convince her it wouldn’t 🙂 )
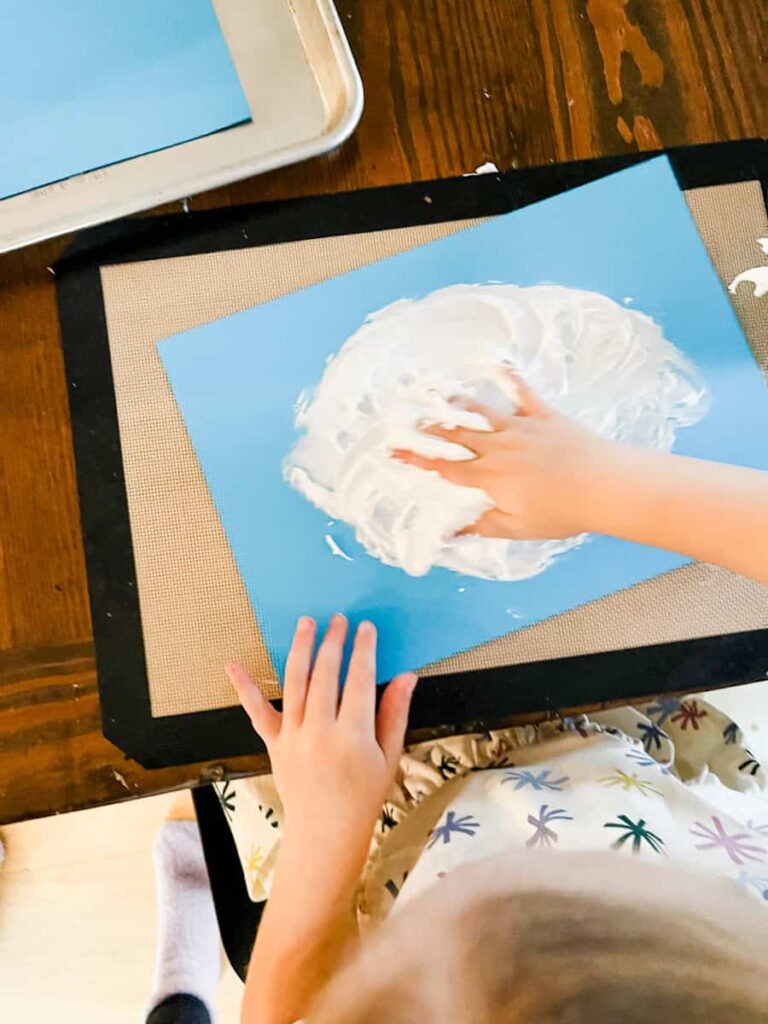
2. Create the melted snow shape
Scoop the puffy paint onto your paper and spread it into a puddle snow shape. We started this process using a paint brush and then things got a little crazy and my kids ended up using their hands, it washed off just fine!
Step 3: Add the snowman’s body
Place googly eyes and the orange carrot nose right onto the fluffy paint. Paper pieces stick well as it dries. You can also now add stick arms, a hat, or a scarf anywhere around the melted puddle.
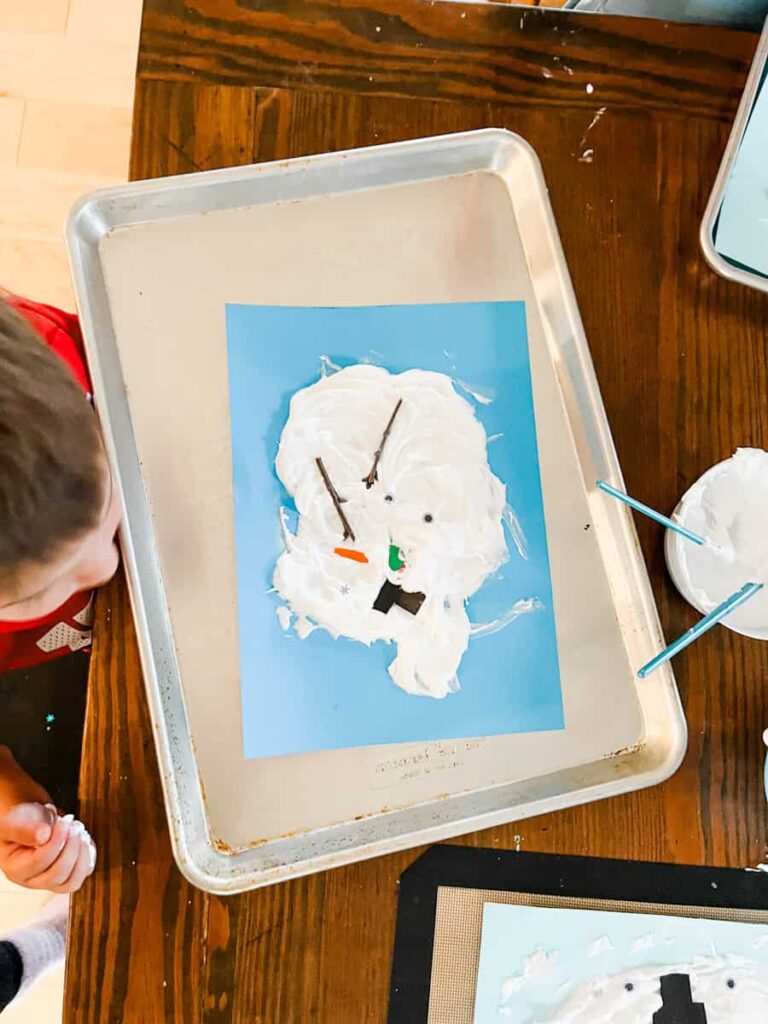
Step 4:Add extra decorations
Kids can sprinkle on glitter, sequins, pom poms, or whatever they would like to finish their melted snowman painting.
Step 5: Let Dry
Let your painted snowman dry overnight.

What Kids Will Learn
This winter craft teaches:
- Fine motor skills through gluing, cutting and placing small pieces
- Sensory exploration with the fluffy, puffy paint, especially if you let them use their hands!
- Creativity and storytelling ask your kids to make up a story about how their snowman melted
Tips for an Easy Craft Time
- Use cardstock or thicker paper so it can hold the weight of the puffy paint.
- There is no wrong way to paint your snowman, but if you spread the paint too thin it won’t be puffy, the thicker you leave it the puffier it will dry. It does start to deflate after a few days, but the initial dried puffy texture is so fun for kids to touch.
- Pre-cut accessories for younger preschoolers to make crafting smoother.
This puffy paint melted snowman craft is a great winter project for preschoolers and it makes a fun indoor snow day activity. The puffy paint adds a fun sensory element and preschoolers will love making their own melted snowman look as silly, droopy, or melted as they want!
Pin for Later!