Looking for a fun, incredibly simple science experiment to try with your kids? This rubber egg experiment is a great STEM activity to do with kids of all ages. It's so cool to watch as the eggshell dissolves in vinegar, leaving behind a rubbery egg that's bouncy, squishy and glows!
My boys have been loving science experiments recently. This erupting apple volcano experiment was so fun to do and they loved this rainbow rain science experiment!
When I heard about this bouncing egg experiment I knew we had to try it- I'm always game for simple science projects I can do with my kids!
The science activity is not only fun but also a great opportunity to explore science concepts with your kids. It's simple, educational, and provides plenty of hands-on learning. Plus, it's always fun to see the kids' reactions when they realize the egg can bounce like a rubber ball!

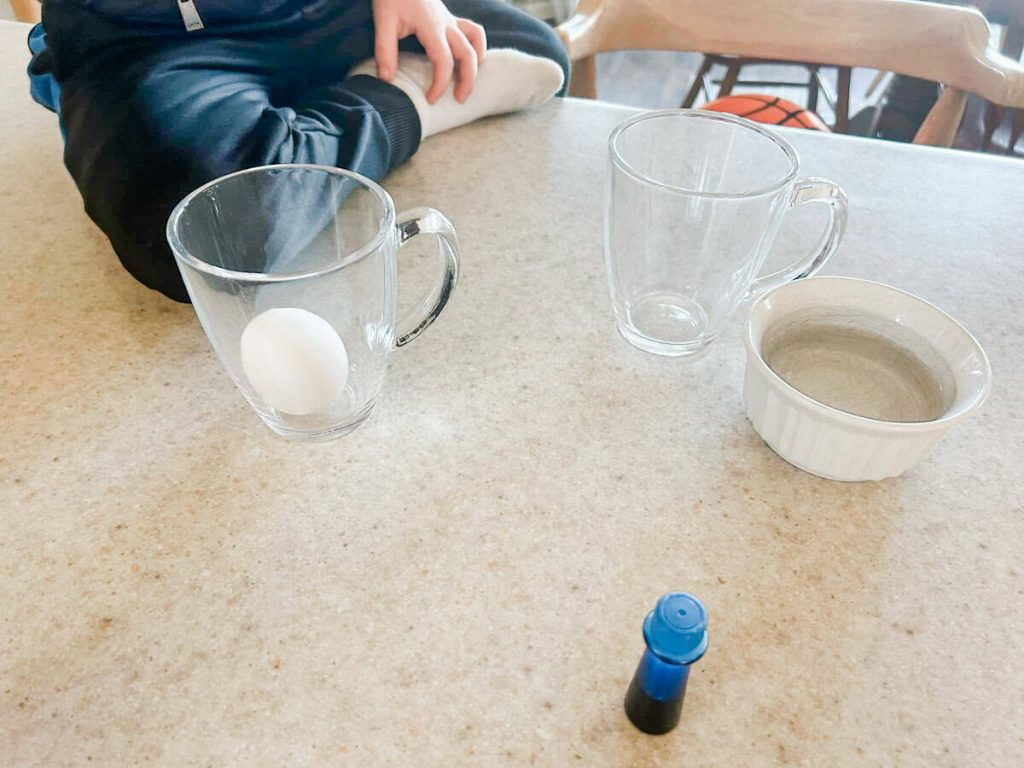
Materials Needed
- 1 raw egg
- 1 cup of white vinegar
- A glass or jar
- Food coloring
How To Create Your Rubber Egg Science Experiment
Place the Egg in a Glass or Jar: Gently place the raw egg in a clear glass or cup (mason jars also work well). The clearer the container, the better, as it's fun to watch the changes over time!
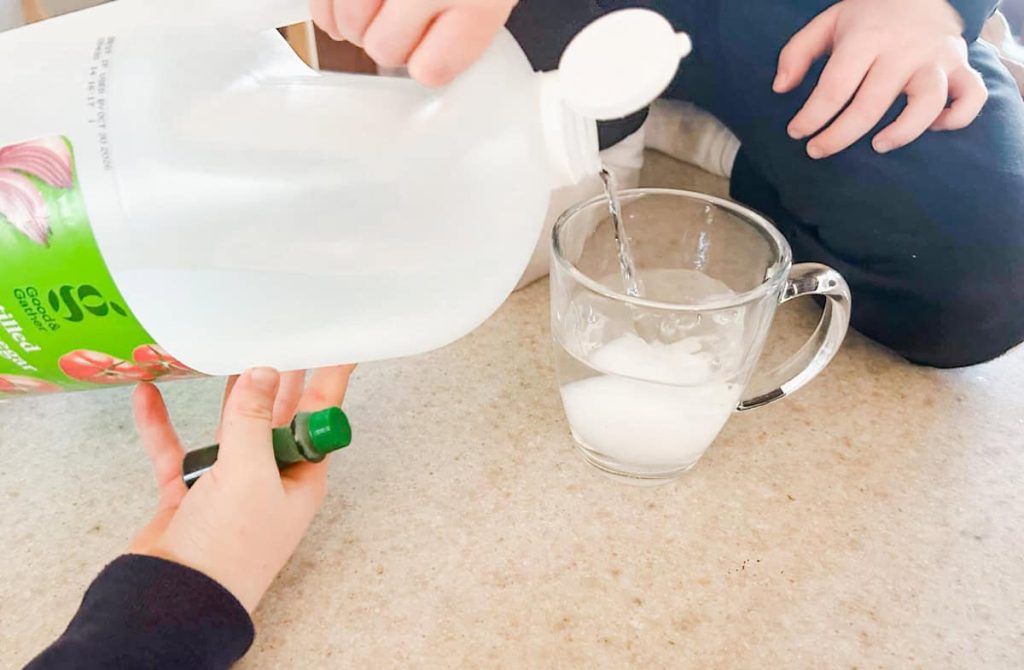
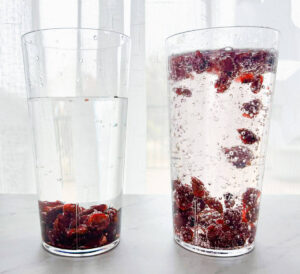
Cover the Egg with Vinegar: Pour vinegar over the egg until it's completely submerged. The acid in the vinegar will start reacting with the calcium carbonate in the eggshell. This process begins immediately!
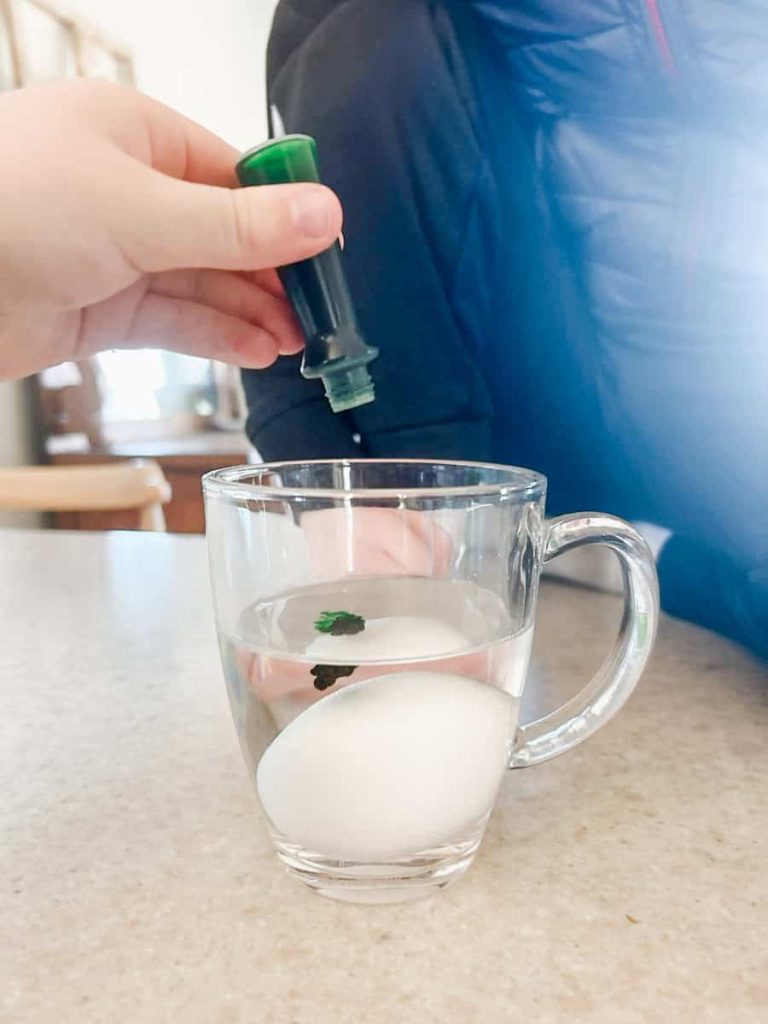
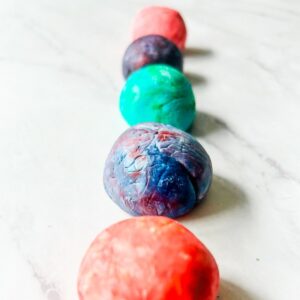
Add Food Coloring: Add 2-3 drops of food coloring and stir gently. This is a really fun way to see how the color absorbs into the semi-permeable membrane.
Wait and Observe: Let the egg sit for 24-48 hours at room temperature. You'll notice little bubbles forming around the egg as the vinegar dissolves the shell of the egg.

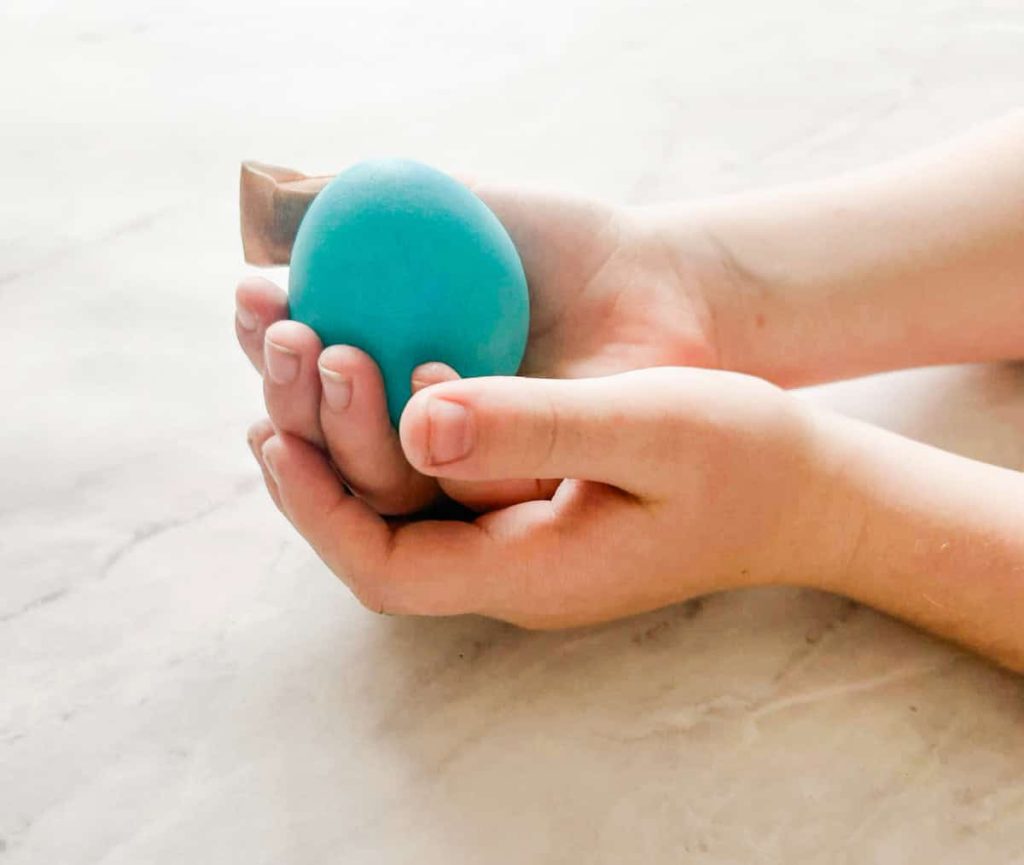
Check Your Egg: After 24-48 hours, carefully remove the egg from the jar. You'll see that the eggshell is completely gone, leaving only the rubbery membrane that holds the egg together.
Once the shell is completely gone wash it off while gently scrubbing the bubbles and excess food coloring off.

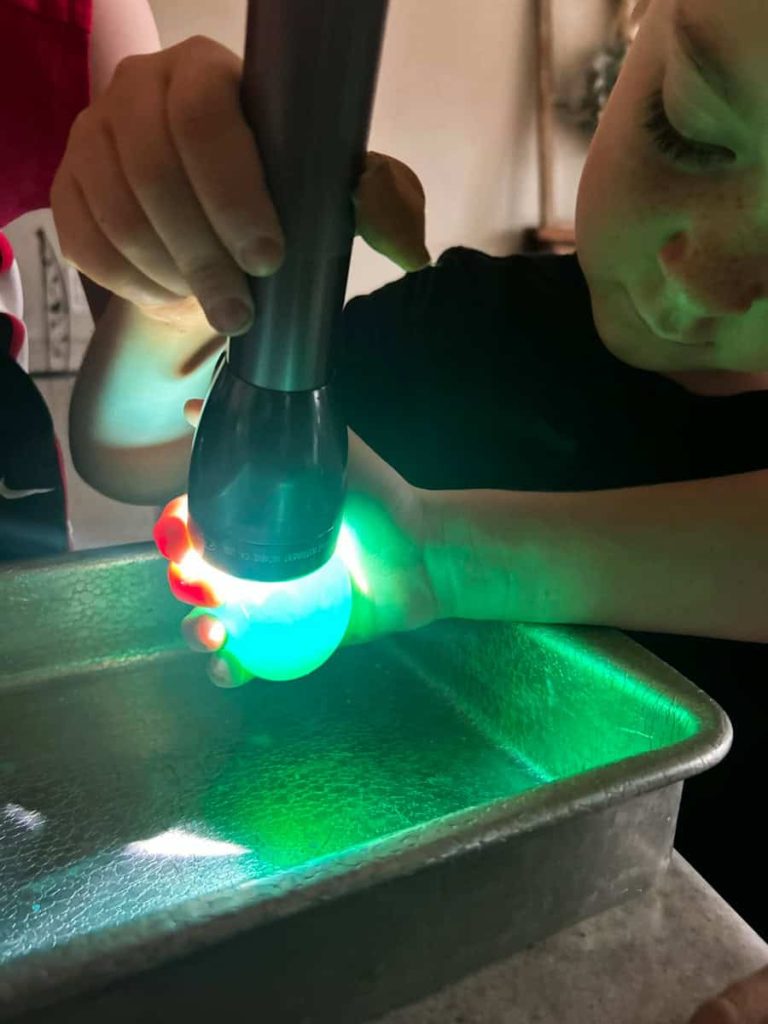
Test the Bounciness: This is the fun part- gently bounce your rubber egg from just a few inches above the surface. We like to use baking pans for this step.
It will bounce and squish, but be careful not to drop it too hard, as it can still break.

The Science Behind This Rubber Egg Experiment
This easy experiment is a great way to start discussion on what a chemical reaction is. The vinegar, which is acidic, reacts to the calcium carbonate in the eggshell which causes it to dissolve. What is left is the membrane that holds the egg's contents together and it creates a rubber-like texture.
You can take it a step further and put a flashlight up to the egg and you can see the inside of the egg- it is so fun for kids to get an "inside look" into what an egg looks like when it is in the shell. It was almost as if the egg was glowing when we did this.
This experiment shows how acids can break down substances and how physical changes can occur through chemical reactions!
Taking This Experiment One Step Further
Trial different liquids: After seeing how the egg reacts in regular vinegar try different liquids like soda, salt water or apple cider vinegar
Create an entire science lesson on this: Talk about scientific method and use this printable template to have your child make their hypothesis, note their observations during the experiment and then create their conclusions at the end of the experiment
Make it fun: Have kids guess how high they can make the egg bounce without it breaking (this was a huge win with my kids)
This rubber egg experiment is such a fun STEM activity to do with kids of all ages. If you do this experiment with your kids we would love for you to share it with us on Facebook or Instagram!
Pin for Later!


So fun! My girls will love to do this! Thank you.
You bet- my boys enjoyed it so much, I hope your girls have fun with it! 🙂