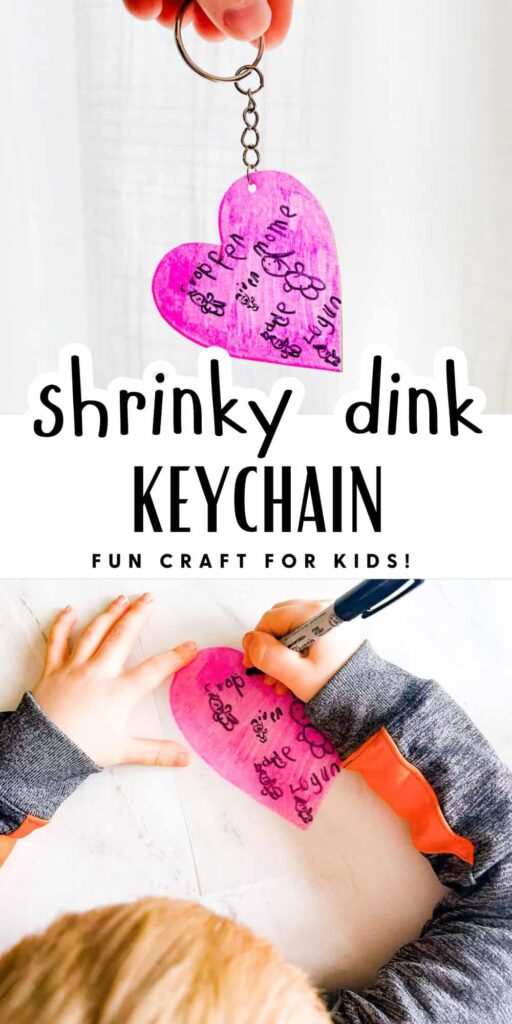
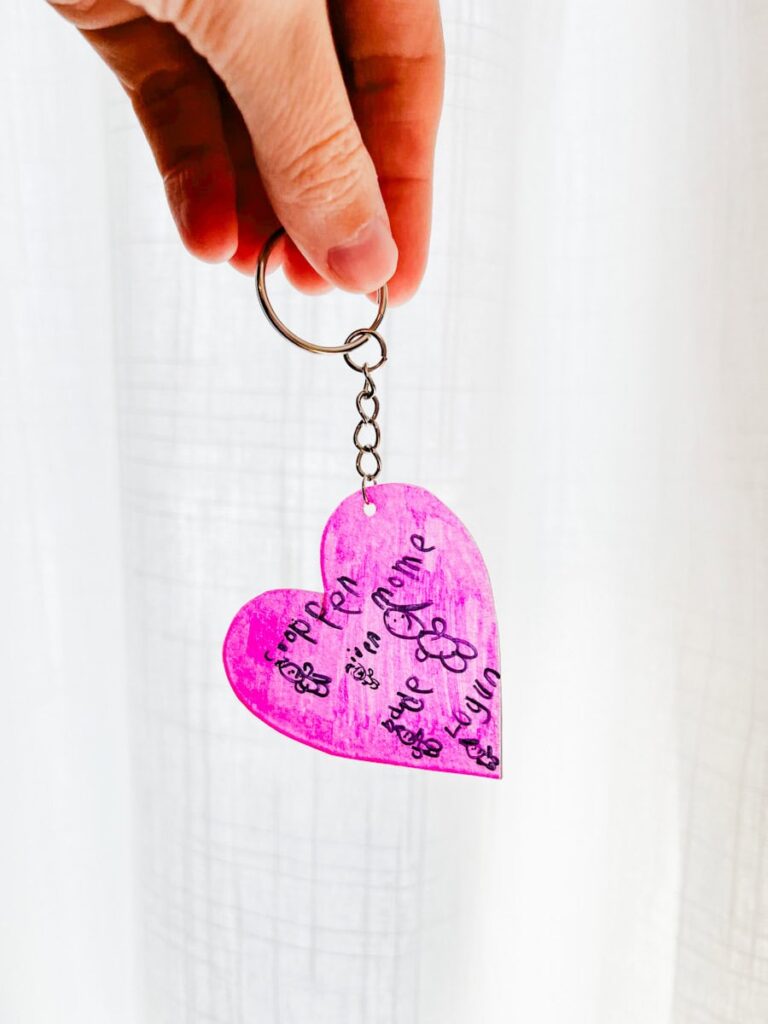
There is something I love about turning a child’s drawing into a sweet keepsake. This shrinky dink keychain heart is so simple but such a fun way to preserve your child’s drawings and makes for the most special gift for loved ones!
This post contains affiliate links, which means I will make a small commission at no extra cost to you. See my full disclosure here.
My kids have been really into shrinky dink crafts lately and my kindergartener wanted to make a extra special one which inspired me to write this post to share the idea with you! He made his shinky dink into a heart and then drew our family on it. Little did I know that this little keychain has now become one of my favorite keepsakes that he has made!
This project is perfect for kids of all ages, the little drawings from younger kids are so sweet but even older kids can make this project special. We love making handmade gifts and these would be a perfect gift for Mother’s Day (and you could pair it with this Mother’s Day questionnaire) , Father’s day or just because!
The best part of this craft was watching my boys’ reactions as they watched their artwork shrink down into a little keychain, it was really fun to bring in some learning to this craft too, here is a full overview of the science behind shrinky dinks!
If youWe also enjoyed making these pressed flower bookmarks and pressed flower pots which would make another great DIY gift idea!
Supplies Needed
- Shrinky dink paper
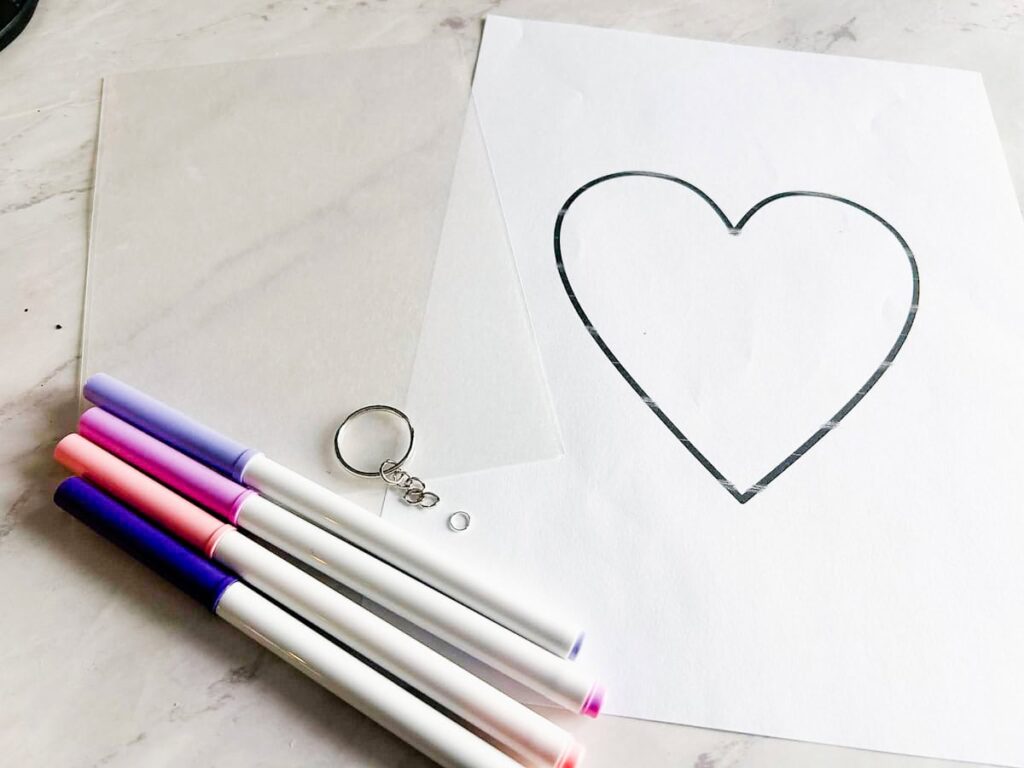
- Printable template (here is the heart shape PDF I used for this craft)
- Permanent markers
- Hole punch
- Scissors
- Keychain & jump ring (the kit linked above includes these)
- Piece of parchment paper or foil
- Baking Sheet or cookie sheet
How To Make A Shinky Dink Keychain
Preheat your oven to 250 degrees Fahrenheit
Put a sheet of foil or parchment paper on a baking sheet & set aside
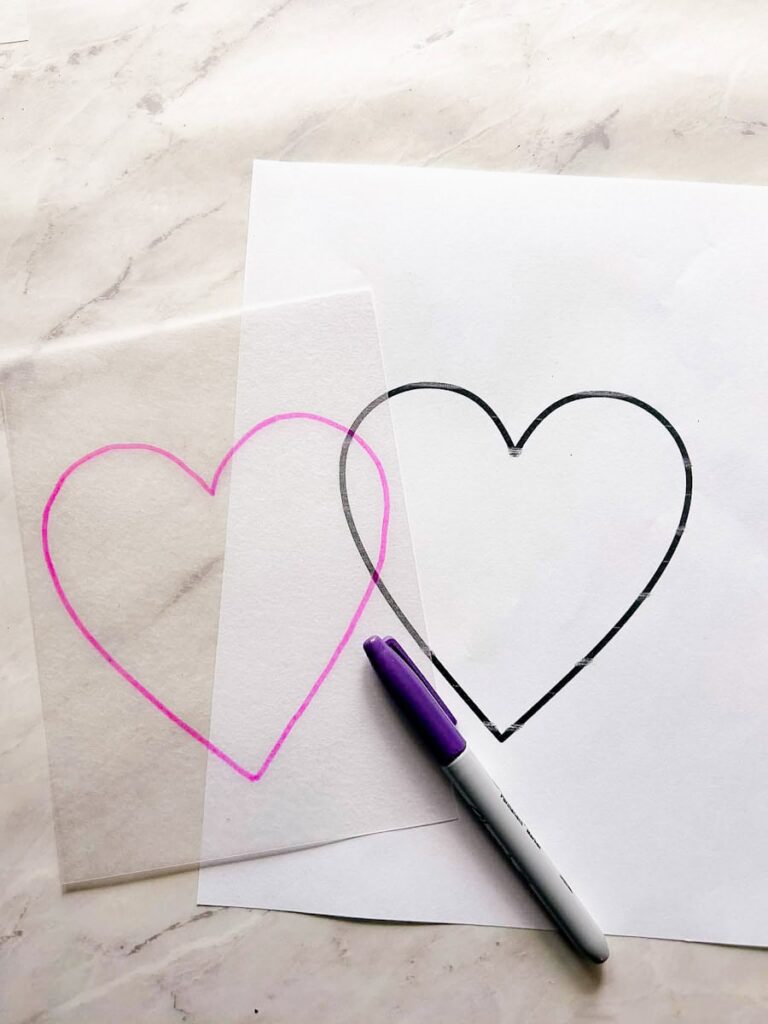
Take out your shrinky dink paper and make sure it is rough side up (it is much easier to draw on the rough side versus the smooth side)
Trace the heart template onto your shrinky dink paper
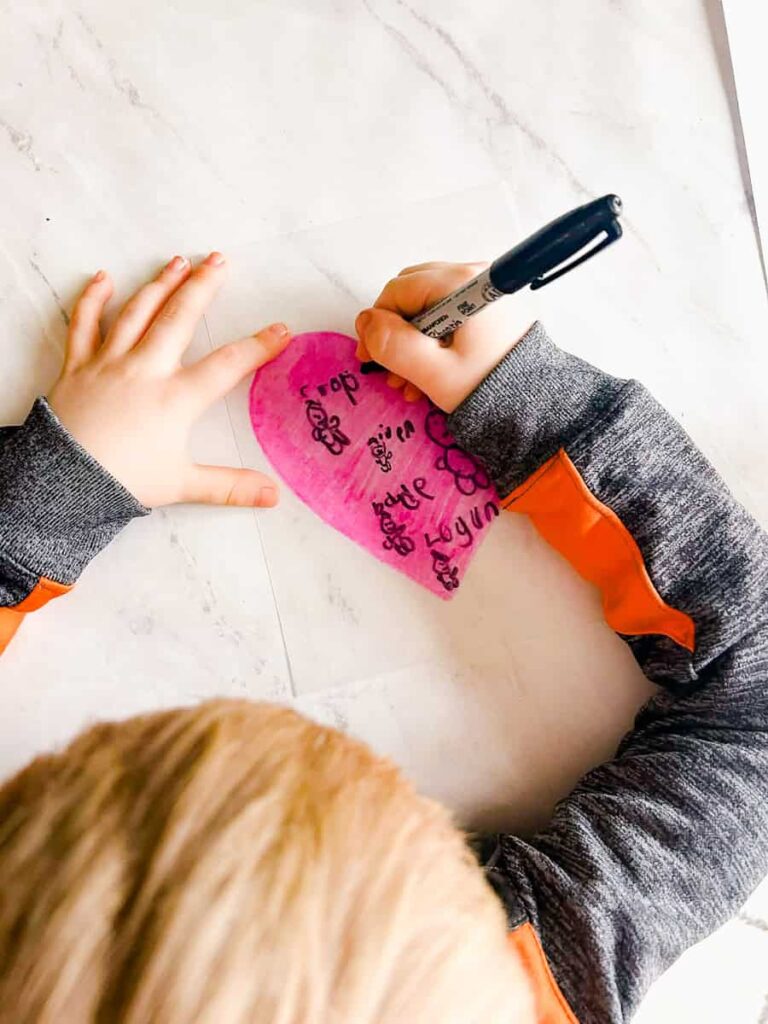
Allow your child to color in the heart as they wish- I recommend using lighter colors for this part so the family portrait is visible later
Then ask your child to draw their family in the heart with black sharpie- you could also forego the child coloring in the heart initially and just have them draw the family portrait onto the heart instead
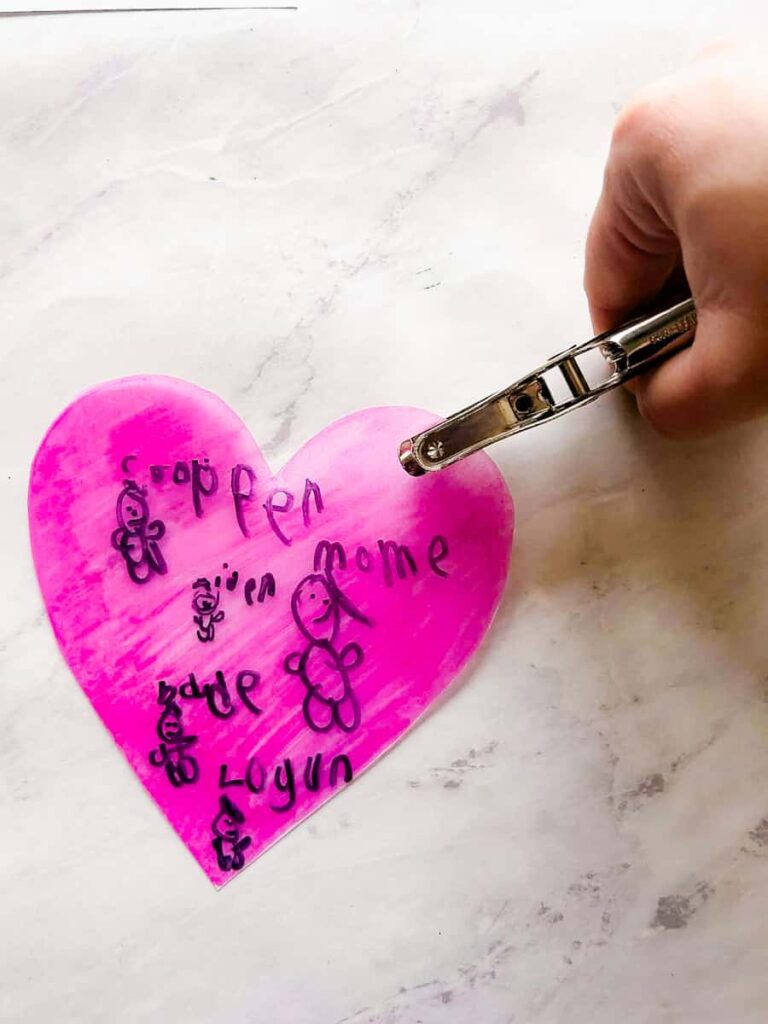
Cut out the heart shape- I recommend an adult do this as the paper is sometimes hard to cut and can crack if bent
Use a hole punch to punch a hole at the top of the heart making sure it is close enough to the top so the jump loop can fit through it
Put the finished heart on the baking pan and put in oven to bake (this process takes just a few minutes)
Watch through the oven window with the oven light on to watch as the heart curls up and then flattens out (this is my kids’ favorite part!)
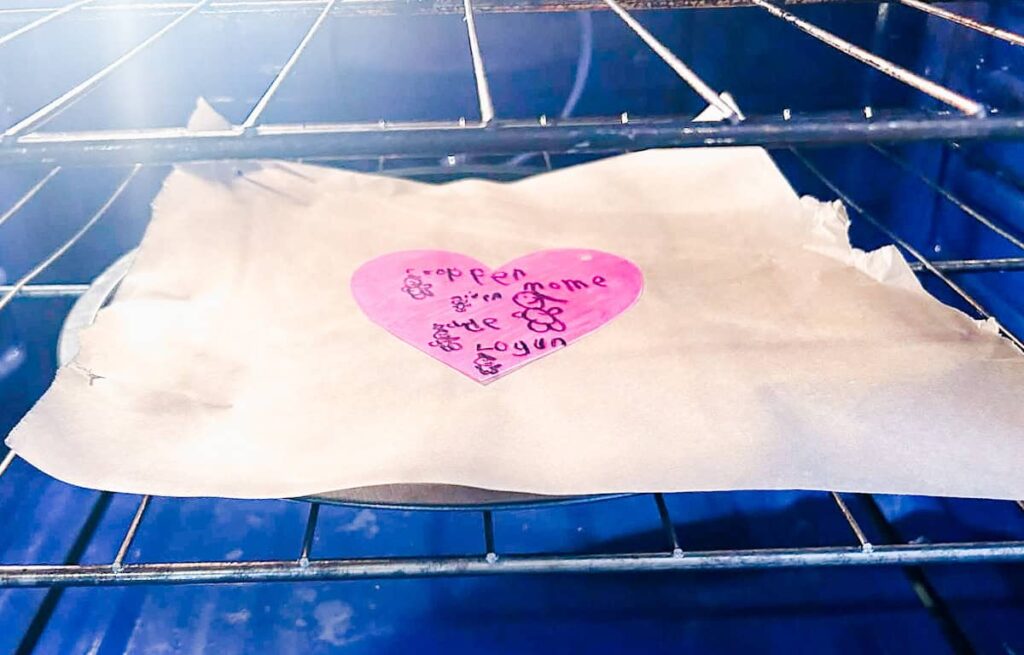
Once the heart looks fairly flat take out of oven, if it needs a little help flattening take your hotpad and push it down on top of the heart lightly to finish the flattening process
Let the keychain cool and once cool attach the jump ring and key chain
Tips For Best Results
- We have tried this with many art mediums and sharpies always turn out the best– we love using bright colors to make the keychain design pop
- Don’t take out the heart too soon from the oven, it’s easy to get nervous that it is not working when it curls, but if left a little longer they always flatten out
- Brand does matter with shrinky dinks paper, we have tried multiple and this is my favorite brand that we have used
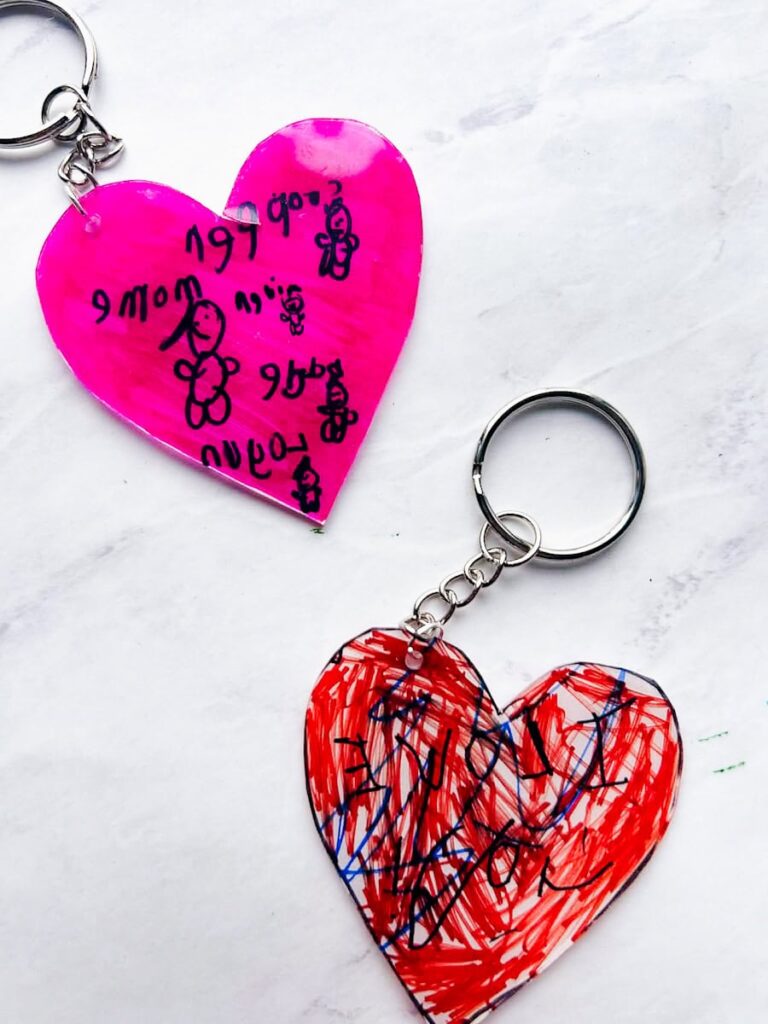
Ways To Use Your Shrinky Dink Keychain
- Gift for Mother’s Day or Father’s Day, it would make a great Christmas gift too
- Use it for a fun classroom party craft, this would be a great Valentine’s Day party activity
- If your child struggles with separation during the school day have them put this on their backpack as a sweet reminder of how much they are loved
Kids grow fast and I find myself holding these keepsakes a little tighter as the years pass. This craft is a great way to capture a little moment in time.
Pin For Later!